
Unboxing a new Keurig K-Mini is exciting, but proper setup is essential to enjoy your coffee maker safely and efficiently. Whether you’re a first-time user or upgrading your kitchen, this guide provides clear, practical steps to get your Keurig ready for your daily brew.

Get home appliances delivered free with Prime
- Fast, free delivery on millions of items
- Prime Video, Amazon Music and more included
- Member-only deals all year
From initial setup to maintenance tips, we’ll cover everything you need to know, including safe handling, troubleshooting common issues, and making the most of your compact coffee maker.
Key Takeaways
| Compact and space-saving design | The K-Mini fits anywhere with less than 5 inches width. |
| Easy water filling | Just add fresh water for each brew with a single cup reservoir. |
| Fast brewing process | Coffee is ready in minutes, perfect for busy mornings. |
| Maintenance crucial for longevity | Regular descaling and cleaning prevent buildup and ensure good flavor. |
| Use compatible accessories | Reusables like the My K-Cup enhance versatility. |
Unboxing and Initial Inspection
Carefully remove your Keurig K-Mini from the packaging. Check that all parts are included and undamaged, especially the drip tray and power cord. The K-Mini is designed for small spaces, making it ideal for apartments, offices, or dorm rooms. Ensure the power cord is intact and accessible to outlet sources.
Before plugging in, verify that the machine is clean and free of packaging debris. This helps prevent any clogging or operational issues when you start brewing.
Setting Up Your Keurig K-Mini
- Place your coffee maker on a stable, flat surface. Ensure it’s near an outlet with enough clearance for the cord.
- Fill the water reservoir. Open the water reservoir lid and add fresh, cold water directly into the reservoir. Remember, the K-Mini is a single-serve machine with a one-cup reservoir, so refill for each brew.
- Power on the machine. Plug into the outlet and press the power button if your model has one. The device will initialize, indicated by a light or display depending on your model.
Adjust the brew size if applicable, selecting between 6oz to 12oz. The K-Mini’s compact design makes it easy to store or transport, but always ensure it is on a stable surface during operation.
Brew Your First Cup
- Insert a K-Cup pod. Lift the brew head and place your preferred pod into the holder, then close securely.
- Select your brew size. Use the control buttons to choose between 6, 8, 10, or 12 oz, depending on your preference.
- Start brewing. Press the brew button. The machine will heat up, which typically takes about a minute, then begin brewing. Coffee will dispense into your cup or travel mug if the drip tray is adjusted accordingly.
Always use a sturdy cup, especially if using a travel mug with the removable drip tray. Do not overfill or force the machine to operate if it’s not properly assembled or filled with water.
Maintenance and Troubleshooting
Proper maintenance ensures your Keurig K-Mini continues to perform well. Regular descaling, cleaning, and using compatible filters are vital.
- Descaling: Use a descaling solution every 3-6 months to remove mineral buildup. Follow the descaling instructions specific to your model, typically involving running a descaling solution through a brew cycle without a pod.
- Cleaning: Rinse the water reservoir and drip tray regularly. Use a damp cloth to wipe down the exterior. Rinse the brew head to prevent clogs.
- Clogging issues: If water isn’t flowing properly, check for clogged needles or buildup. Use a pin or needle to clear the exit needle carefully.
If your machine shows error lights or fails to brew, refer to the troubleshooting section in your manual or contact Keurig support.
Tips for Best Performance & Safe Use
- Use fresh, cold water each time to ensure optimal flavor and prevent mineral buildup.
- Don’t exceed the maximum fill line in the reservoir.
- Keep the machine unplugged when not in use for extended periods.
- Always use compatible accessories, such as the My K-Cup reusable filter, if you want to brew ground coffee.
Follow safety warnings, especially avoiding contact with hot water or steam, and keep the machine out of reach of children when operating.
The Products in This Guide

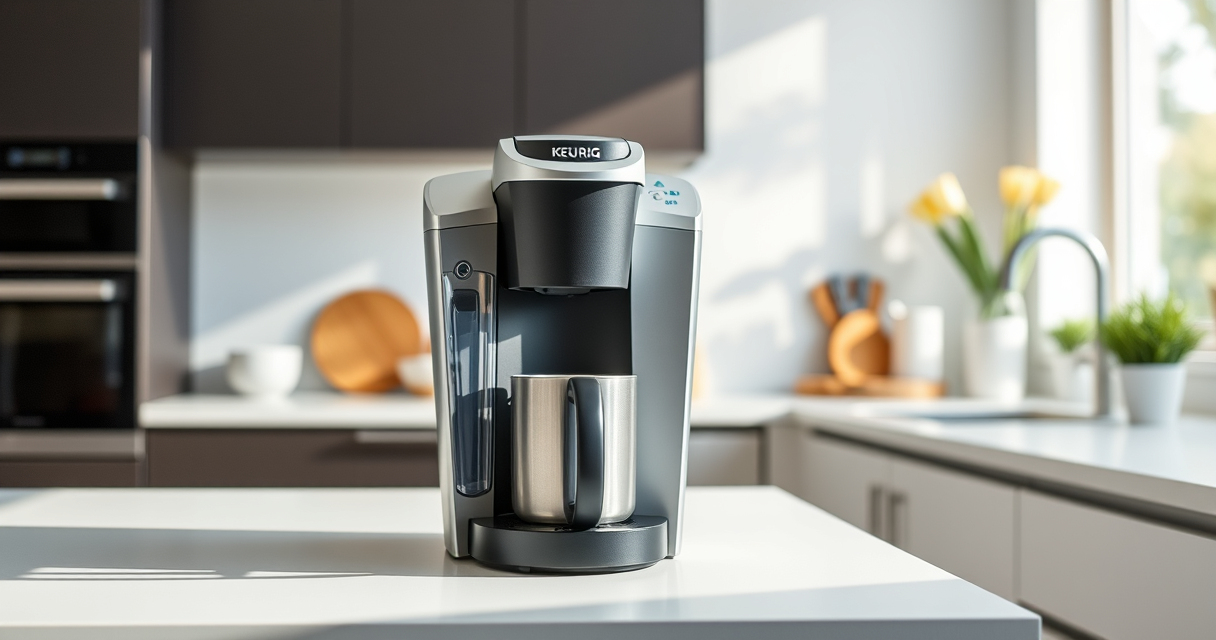
Keurig K-Mini Single Serve K-Cup Pod Coffee Maker
- ✔ Width: Under 5 inches
- ✔ Brew Range: 6-12 oz
- ✔ Travel Mugs: Up to 7 inches tall

My K-Cup® Reusable Coffee Filter
- ✔ Material: Plastic
- ✔ Capacity: Single cup
- ✔ Compatibility: Keurig models
Keurig K-Mini Single Serve K-Cup Pod Coffee Maker
The Keurig K-Mini is a compact, efficient coffee maker perfect for small spaces. Its simple design, quick brew time, and easy maintenance make it an excellent choice for everyday use.
Pros:
- Fits easily into small kitchens or offices
- Brews quickly in 6-12 oz sizes
- Removable drip tray for travel mugs
- Auto off energy-saving feature
Cons:
- Limited water reservoir requires frequent refills
- No on/off button—automatic power control
- Not compatible with larger travel mugs beyond 7 inches
Best for: Individuals looking for a compact, hassle-free coffee maker
Not ideal for: Users needing large capacity or multiple brew options
Bottom line: A sleek, space-saving coffee maker ideal for small spaces and quick, fresh brews.
My K-Cup® Reusable Coffee Filter
The My K-Cup reusable coffee filter allows you to brew your favorite ground coffee with your Keurig, reducing waste and expanding your options. Easy to use and compatible with the K-Mini, it’s a smart addition for eco-conscious users.
Pros:
- Brew with ground coffee
- Eco-friendly reusable design
- Compatible with multiple Keurig models
- Extracts full flavor
Cons:
- Requires measuring ground coffee
- Slightly more cleanup than a pod
- Must be cleaned regularly
Best for: Coffee enthusiasts who prefer ground coffee and sustainability
Not ideal for: Those seeking ultra-quick convenience with pre-packaged pods
Bottom line: A practical, eco-friendly way to brew ground coffee with your Keurig.
Frequently Asked Questions
Can I use ground coffee instead of K-Cups?
Yes, with a reusable filter like the My K-Cup, you can brew ground coffee in your Keurig K-Mini.
How often should I descale my Keurig K-Mini?
It is recommended to descale every 3-6 months to prevent mineral buildup and maintain optimal performance.
What should I do if my coffee isn’t brewing properly?
Check for clogs or mineral deposits. Clean the needles and descale the machine if necessary. Ensure water reservoir is filled properly.
Is the K-Mini suitable for travel?
Yes, its compact size and removable drip tray make it travel-friendly, but only for cups up to 7 inches tall.
Can I brew different cup sizes?
Yes, the K-Mini allows you to select between 6 to 12 oz brew sizes based on your preference.
Start Your Coffee Journey with Confidence
With proper setup and regular maintenance, your Keurig K-Mini will provide quick, fresh coffee for years to come. Remember to clean and descale periodically, and enjoy the convenience of a space-saving design that fits into any corner of your home or office.
Now that you’re equipped with this step-by-step guide, brewing your perfect cup has never been easier or safer. Cheers to great mornings and better coffee experiences!
Affiliate disclosure: As an Amazon Associate we earn from qualifying purchases. Prices and availability are accurate as of the time of publishing.
Fall Picks
fall essentials
As an affiliate, we earn on qualifying purchases.