
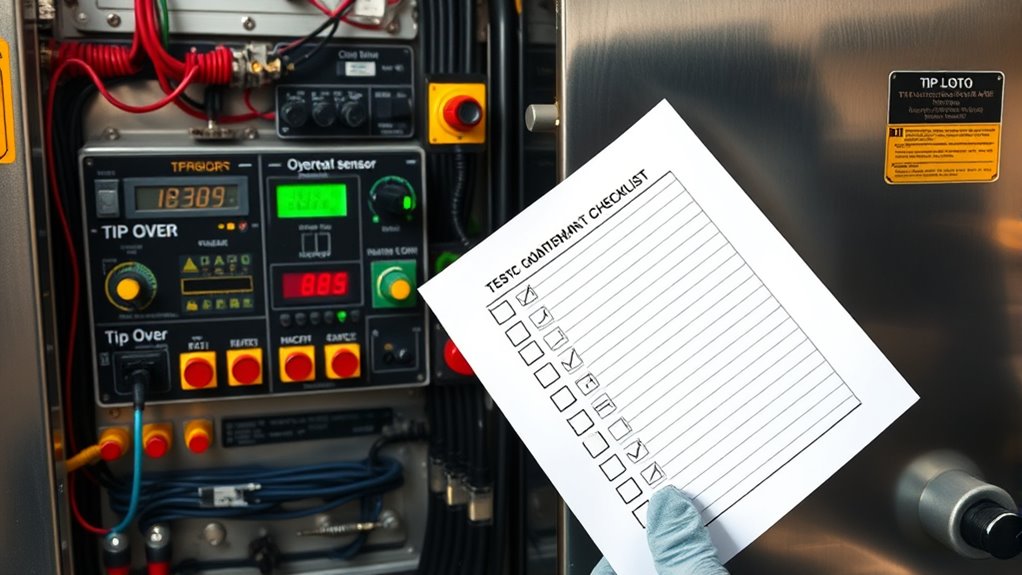
To stop guessing, start with a thorough checklist for tip-over and overheat sensors. Begin by verifying power and network connections, then perform visual inspections for damage or dirt. Use the right tools to test sensors’ responses and guarantee alarms activate properly. Document all maintenance work and schedule regular checks. Troubleshoot issues like false alarms or delayed responses promptly. Keep everything calibrated and in good condition—if you follow these steps, you’ll improve safety and system reliability. Learn more as you continue to explore the process.
Key Takeaways
- Regularly calibrate sensors to ensure accurate tip-over and overheat detection.
- Use proper tools and follow manufacturer procedures for sensor testing and replacement.
- Conduct visual inspections for physical damage, dirt, or loose connections on sensors.
- Verify sensor response by simulating tip-over or heat conditions and confirming alarm activation.
- Maintain system reliability through consistent power, connectivity checks, and firmware updates.

ANGSO-AUTO ADAS Calibration Tool Kit Compatible with Honda Toyota Kia Ford ADAS Radar Aiming Calibration Tool,Post with 0-30 Centimeter Scale,Corner Reflector Target with Billet Aluminum Stand
Universal Compatibility: Fit for Honda, Toyota, Kia, and Ford vehicles,Whether you're a professional mechanic or a DIY enthusiast,…
As an affiliate, we earn on qualifying purchases.
As an affiliate, we earn on qualifying purchases.
Understanding the Importance of Sensor Testing

Understanding the importance of sensor testing is essential because sensors are the first line of defense against accidents like tip overs and overheating. Proper sensor calibration ensures your sensors give accurate readings, preventing false alarms or missed detections. Regular calibration helps maintain reliability and safety. Additionally, firmware updates are critical because they improve sensor performance, fix bugs, and add new features. Keeping firmware current ensures your sensors operate at peak efficiency and adapt to evolving safety standards. Skipping these steps can lead to malfunction, putting your equipment and safety at risk. By routinely testing sensors, calibrating them, and updating firmware, you ensure that they respond correctly when it matters most, providing you with peace of mind and a safer environment. Essential oils have properties that can support mental clarity and reduce stress, which can be beneficial during routine safety checks.

Photoelectric & Proximity Switch Tester
Application: Optoelectronic/Proximity/Magnetic/Fiber Amplifier
As an affiliate, we earn on qualifying purchases.
As an affiliate, we earn on qualifying purchases.
Gathering Necessary Tools and Materials
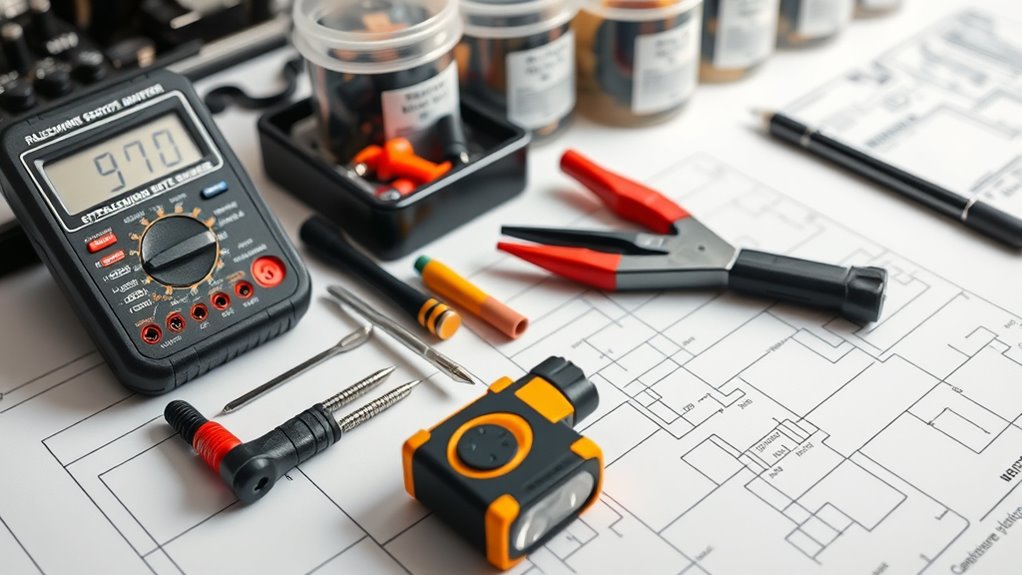
Before starting your sensor inspection, you need to gather the essential tools and materials. Make sure you have the required tools list on hand and know where to find replacements or extras. Don’t forget safety gear essentials to protect yourself during the process. Additionally, understanding the importance of proper projector maintenance can help ensure your device functions optimally and lasts longer.
Required Tools List
To guarantee a smooth installation or maintenance process for sensors, you’ll need to gather the right tools and materials beforehand. Proper tools make sensor calibration and replacement easier, saving you time and effort. Here’s a quick list to get you started:
- Screwdrivers (Phillips and flat-head) for removing and securing panels
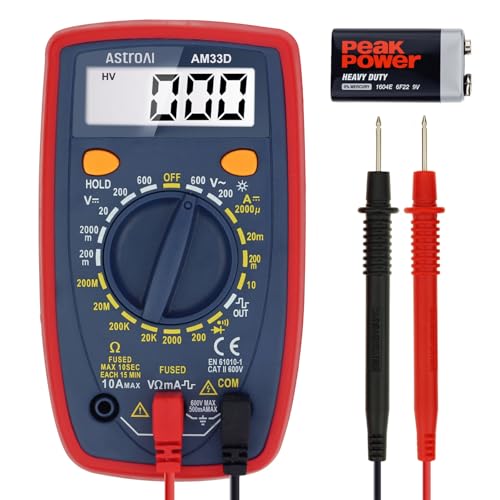
- Multimeter for testing electrical connections and sensor functionality
- Calibration device or software to ensure accurate sensor readings
- Replacement sensors compatible with your system
Having these tools ready ensures you can perform precise sensor calibration and efficiently replace faulty sensors. Proper preparation minimizes errors and keeps your system running smoothly. Double-check compatibility and calibration requirements before starting to avoid delays or inaccuracies. Additionally, understanding site optimization techniques can help improve overall system performance and reliability.
Material Procurement Tips
Efficiently gathering the right tools and materials is essential to guarantee a smooth sensor installation or maintenance process. Start by ensuring you have the correct sensors compatible with your system, along with calibration tools for accurate sensor calibration. If you’re replacing sensors, confirm that replacement procedures are clear and that you have spare parts ready. Gather screwdrivers, multimeters, and mounting brackets needed for installation. It’s also helpful to have access to manufacturer manuals to follow proper calibration and replacement steps. Double-check that all materials meet safety and quality standards to prevent future issues. Proper procurement ensures your project stays on track and that sensors function reliably once installed or calibrated. Paying attention to sensor compatibility can prevent mismatches and installation errors.
Safety Gear Essentials
Ensuring you have the right safety gear is essential for protecting yourself during sensor installation or maintenance. Proper personal protective gear minimizes risks and supports emergency preparedness. Before starting, gather fundamental items such as:
- Safety goggles to shield your eyes from debris
- Work gloves for a secure grip and hand protection
- A dust mask or respirator to prevent inhaling harmful particles
- Ear protection if working near loud equipment
Having these tools ready keeps you safe and prepared for unexpected situations. Wearing the appropriate personal protective gear guarantees you’re ready to handle any hazards safely. It also demonstrates good emergency preparedness, reducing the chance of injury. Always double-check your safety gear before beginning work to stay secure and confident throughout the process. Proper safety gear isn’t just a precaution; it’s an indispensable part of a responsible maintenance routine. Incorporating personal protective equipment into your workflow can also support protocols used in sound healing and other health-enhancing practices.

41A5034 Safety Sensor Kit, Replacement for Craftsman/Chamberlain/Liftmaster Garage Door Sensor, Compatible with Liftmaster/Chamberlain/Craftsman Garage Door openers Made After 1997
Universal Compatibility: Replacement for craftsman/Chamberlain/Liftmaster garage door sensor, Compatible with all garage door openers manufactured by Liftmaster/Sears/Chamberlain/Craftsman after…
As an affiliate, we earn on qualifying purchases.
As an affiliate, we earn on qualifying purchases.
Ensuring Power Supply and Connectivity
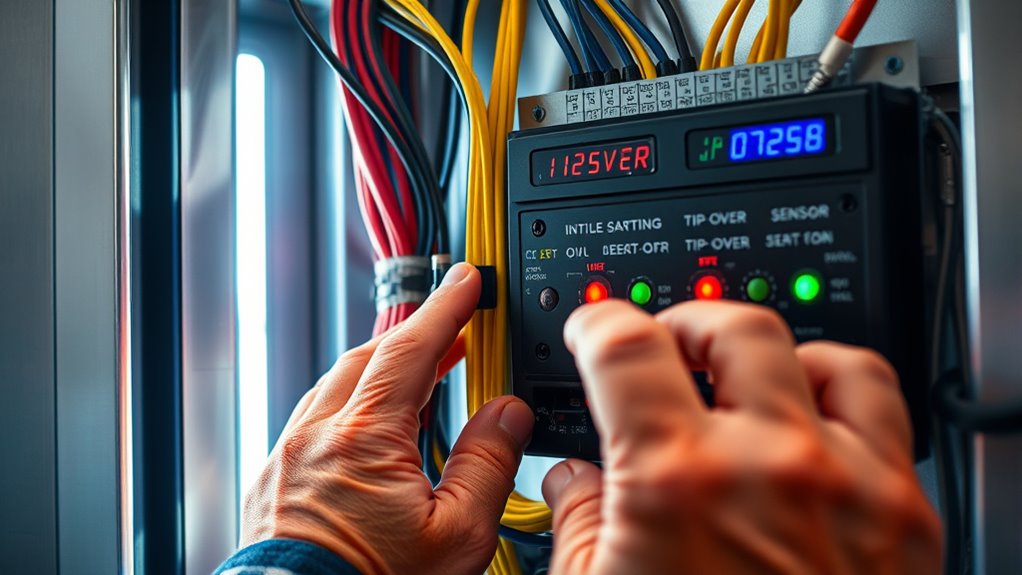
Start by checking that all power connections are secure and properly plugged in. Then, make certain your circuit breakers haven’t tripped and are functioning correctly. Finally, test your network to confirm there’s stable connectivity, so your sensors operate without interruption. Additionally, ensuring your system is protected against data privacy challenges can prevent potential security breaches affecting your sensors.
Verify Power Connections
Before operating your sensors, it’s essential to verify that all power connections are secure and functioning properly. Loose or faulty connections can lead to inaccurate sensor calibration or missed overheat alerts. Check that power cords are firmly plugged into outlets and sensors are connected to their power sources. Inspect for damaged cables or corrosion that might disrupt connectivity. Ensure that any necessary firmware updates have been applied, as outdated firmware can cause communication issues. Confirm that power indicators on sensors are lit, signaling proper operation. If your sensors include backup power options, verify they’re active. Proper power connection setup helps maintain reliable readings and prevents false alarms related to power issues. Taking these steps ensures your sensors operate smoothly and accurately. Additionally, understanding the cycle of breakups can help you recognize patterns that may affect your focus on maintenance routines.
Check Circuit Breakers
To confirm your sensors have a reliable power supply, you need to check the circuit breakers. Regular circuit breaker maintenance is essential to prevent unexpected outages that could disrupt sensor operation. Start by turning off the main power and inspecting your electrical panel for any tripped breakers. Reset any that have flipped to the off position, and ensure they’re firmly seated. While doing this, verify that your electrical panel safety measures are intact—look for signs of corrosion, damage, or wear. A well-maintained circuit breaker system helps avoid electrical issues that may cause false alarms or sensor failures. Additionally, consider the benefits of proper maintenance to keep your system running smoothly and prevent issues caused by power interruptions. Taking these steps ensures your sensors stay powered and connected, reducing the risk of malfunction due to power interruptions.
Test Network Stability
After verifying your circuit breakers are functioning properly, it’s important to make certain your network connection remains stable. A reliable connection ensures your sensors stay calibrated and accurately detect tip-over or overheat events. Check your Wi-Fi or Ethernet connections for consistent signal strength, avoiding interference that can disrupt sensor communication. Confirm sensor placement is optimal—mounted securely and away from sources of interference like metal or heat. Regularly test network stability by pinging your device or running speed tests. Ensure firmware updates are installed to improve connectivity. Maintain a dedicated network segment for your sensors if possible. This minimizes lag and packet loss, keeping your sensor calibration precise and your safety systems responsive. A stable network is crucial for real-time alerts and effective sensor function. Understanding network stability is essential for maintaining sensor performance and ensuring ongoing safety.
AstroAI Digital Multimeter Tester 2000 Counts with DC AC Voltmeter and Ohm Volt Amp Meter; Measures Voltage, Current, Resistance, Continuity and Diode, Blue
Additional Tips – The following incorrect operations may cause the multimeter not to show results: Firstly, the plugs…
As an affiliate, we earn on qualifying purchases.
As an affiliate, we earn on qualifying purchases.
Visual Inspection of Sensor Components
Performing a visual inspection of sensor components is a crucial step in guaranteeing their proper function and safety. Carefully examine each sensor for signs of damage, corrosion, or dirt that could impair performance. Look for loose connections or broken wires that might affect sensor calibration. Check the mounting hardware to ensure sensors are securely positioned. If you notice any damaged parts or inconsistent readings, consider component replacement to restore accuracy. Clean sensors gently with a soft cloth to remove dust or debris, but avoid using harsh chemicals. Regular visual checks prevent issues before they escalate, saving you time and money. Additionally, understanding the sensor calibration process can help ensure accurate detection and proper operation. By maintaining clear, undamaged sensors, you help guarantee reliable tip over and overheat detection, keeping your equipment and operators safe.
Testing Tip Over Sensors for Proper Functionality

To guarantee your tip over sensor works correctly, start with a visual inspection to spot any physical damage or loose connections. Next, simulate overheat conditions to see if the sensor responds appropriately. Finally, verify the sensor’s response with a test to confirm it activates as designed.
Visual Inspection Techniques
Visual inspection is a critical step in verifying that tip over sensors are functioning correctly. Start by checking for physical damage, like cracks or corrosion, that could interfere with sensor calibration. Look for loose wiring or connections that might cause false readings. Inspect the sensor mounting to ensure stability and proper alignment. Examine the sensor components for signs of wear or corrosion, which may require component replacement. Confirm that the sensor housing is clean and free of debris to maintain accurate detection. By carefully reviewing these elements, you ensure the sensor’s reliability and proper operation. This process helps identify issues early, preventing false activations or failures, and keeps your system safe and compliant.
Simulate Overheat Conditions
Simulating overheat conditions is an effective way to verify that tip over sensors respond correctly under abnormal temperature scenarios. To do this, you should carefully adjust or mimic environmental factors that influence sensor calibration, such as heat sources or temperature probes. Confirm the environment reflects realistic conditions your equipment might encounter, avoiding external influences that could skew results. By doing so, you can confirm that the sensor detects overheating accurately and triggers the appropriate safety response. Remember, proper simulation helps identify if the sensor’s calibration remains reliable across temperature fluctuations. Avoid rushing this step; precise control over environmental factors ensures meaningful testing results. This process helps ensure your overheat sensors will perform reliably when actual high-temperature situations occur.
Verify Sensor Response
Ensuring that tip-over sensors respond correctly requires active testing of their functionality under controlled conditions. To do this effectively, verify sensor calibration by applying gentle pressure or tilt to simulate tip-over scenarios. Check sensor placement to guarantee it’s correctly positioned for ideal detection. Confirm that the sensor reacts promptly without delay or false alarms. When testing, consider these key points:
- Adjust the sensor calibration if response times are slow or inconsistent
- Guarantee proper sensor placement to cover all critical angles
- Use a controlled tilt to mimic real tipping conditions
- Observe if the sensor triggers the alarm or shutdown as intended
Verifying Overheat Sensor Effectiveness

To confirm that your overheat sensor is working properly, you should perform a targeted test that activates the sensor and verifies its response. Begin by ensuring proper sensor calibration, so readings are accurate. Check the sensor placement—make sure it’s positioned where it can effectively detect temperature changes without obstruction. Use a heat source safely near the sensor to simulate an overheat condition, and observe whether the sensor responds as expected. If it doesn’t react promptly or accurately, recalibrate or reposition the sensor as needed. Proper calibration and correct placement are essential for reliable performance. This test helps you identify any issues before actual overheating occurs, ensuring your safety system functions when it matters most.
Confirming Alarm and Indicator Responses

When testing your alarm and indicator responses, it’s important to trigger the system intentionally to verify that they activate correctly. This step ensures your sensors are properly calibrated and the alarm customization settings are effective. You should see clear, immediate responses that confirm the system’s functionality:
- Alarm sounds sharply and at the correct volume
- Indicator lights illuminate fully and consistently
- Visual alerts match the specific sensor triggered
- System resets smoothly without false alarms
Performing these checks helps identify calibration issues or faulty connections. If responses aren’t as expected, recalibrate sensors or adjust alarm settings to improve accuracy. Confirming alarm and indicator responses safeguards your equipment and ensures accurate alerts during real emergencies.
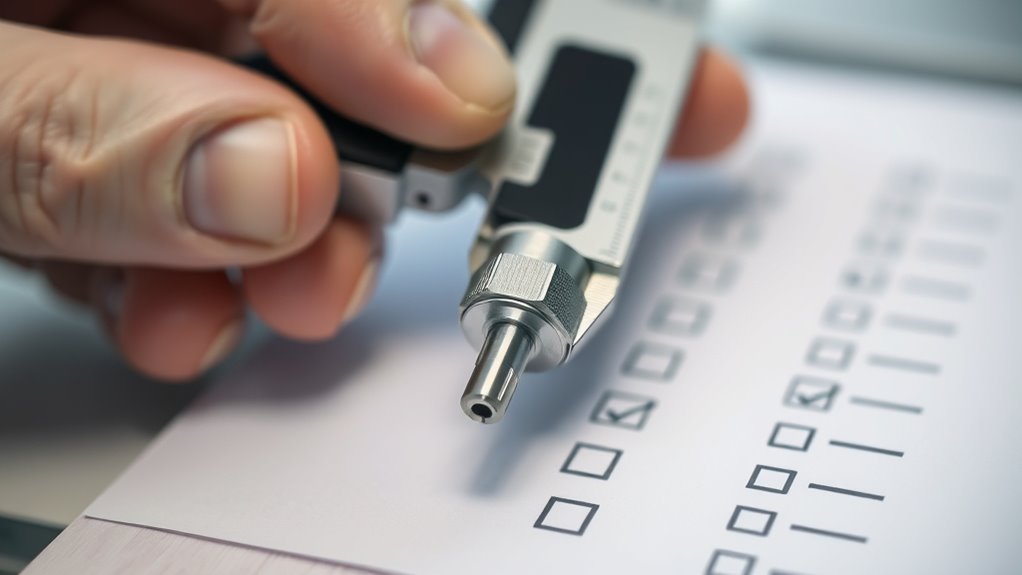
Documenting Test Results and Maintenance History
Keeping detailed records of your test results and maintenance activities is essential for tracking your system’s performance over time. Accurate documentation helps you identify patterns, such as sensor calibration issues or recurring faults. Use data logging to record sensor responses during each test, including any anomalies or delays. Maintain a log of maintenance activities, like sensor replacements or adjustments, along with dates and observations. This organized approach ensures you can verify whether your sensors operate within specified parameters and when calibration is needed. Clear records also support troubleshooting and provide evidence for warranty claims. By consistently documenting these details, you create a reliable history that keeps your tip-over and overheat sensors functioning at their best and helps prevent unexpected failures.
Scheduling Regular Sensor Checks

Regularly scheduling sensor checks is essential to guarantee your tip-over and overheat systems stay reliable and responsive. Consistent inspections ensure sensor calibration remains accurate, preventing false alarms or missed detections. During these checks, you’ll verify alarm calibration, confirming alerts trigger at correct thresholds. Visualize your process with these steps:
Regular sensor checks keep tip-over and overheat systems accurate and reliable.
- Testing sensors in controlled conditions to confirm proper function
- Recalibrating sensors to maintain accuracy and sensitivity
- Adjusting alarm calibration to prevent false positives or negatives
- Documenting results to track performance over time
Troubleshooting Common Sensor Issues

Sensor issues can disrupt the performance of your tip-over and overheat systems, so it’s important to identify and resolve problems promptly. If sensors aren’t responding correctly, start by checking their calibration; improper calibration can cause false alarms or missed detections. Next, verify if firmware updates are available, as outdated firmware may lead to sensor malfunctions or communication errors. Regularly updating firmware ensures your sensors operate with the latest improvements and bug fixes. Additionally, inspect the sensors for physical damage or dirt that could interfere with their function. Recalibrate sensors if needed, and install any available updates to keep everything running smoothly. Prompt troubleshooting helps avoid false alarms and maintains system reliability, protecting your equipment and safety.
Frequently Asked Questions
How Often Should Tip Over and Overheat Sensors Be Tested?
You should test tip over and overheat sensors during regular maintenance schedules, typically every 6 to 12 months. Regular sensor calibration is essential to guarantee proper functioning, so incorporate testing into your routine maintenance. If you notice any signs of malfunction or irregular readings, test them immediately. Consistent testing helps prevent accidents and keeps your safety systems reliable, ensuring they activate when needed most.
Can Sensor Issues Cause False Alarms or Missed Detections?
Sensor issues can definitely cause false alarms or missed detections. When you neglect proper sensor calibration, alarm reliability drops, leading to unpredictable system responses. A misaligned or dirty sensor might trigger false alerts, while a faulty one could overlook real hazards. Regularly testing and calibrating your tip over and overheat sensors ensures accurate detection, maintaining safety and preventing unnecessary disruptions. Don’t risk safety—keep your sensors properly calibrated and functioning correctly.
What Are Common Signs of Sensor Malfunction?
You’ll notice sensor malfunction through inconsistent readings, false alarms, or missed detections. Poor sensor calibration often causes these issues, leading to unreliable data. During fault diagnosis, look for physical damage or loose connections. If you see these signs, recalibrate the sensor and inspect for faults. Regular maintenance helps make sure sensors function correctly, preventing false alarms or missed detections and keeping your system reliable.
Are There Specific Safety Standards for Sensor Testing Procedures?
Like a seasoned sailor following precise navigational charts, you must comply with specific safety standards for sensor testing procedures. These standards often include rigorous sensor calibration protocols and require safety certifications to ensure reliability. Regulatory bodies, such as OSHA or UL, set these guidelines, so you can trust your testing process to meet industry safety benchmarks. Following these standards helps prevent malfunctions and guarantees your sensors operate safely and effectively.
How Do Environmental Factors Affect Sensor Performance Over Time?
Environmental factors like humidity, temperature fluctuations, and dust can cause environmental degradation, which impacts sensor performance over time. These elements may lead to sensor calibration drift, reducing accuracy and reliability. To maintain peak function, you should regularly check and recalibrate sensors, especially in harsh environments. Proper protective measures, like enclosures and filters, help minimize environmental effects, ensuring consistent sensor performance and safety.
Conclusion
By following this checklist, you’re building a fortress of safety around your equipment—each sensor a vigilant guard standing firm. Regular testing keeps your system sharp and ready, turning uncertainty into confidence. Remember, neglecting these steps is like leaving a window open in a storm—vulnerable and exposed. Stay proactive, keep your sensors in top shape, and watch as peace of mind becomes your steadfast shield against unexpected overheating or tipping hazards.