
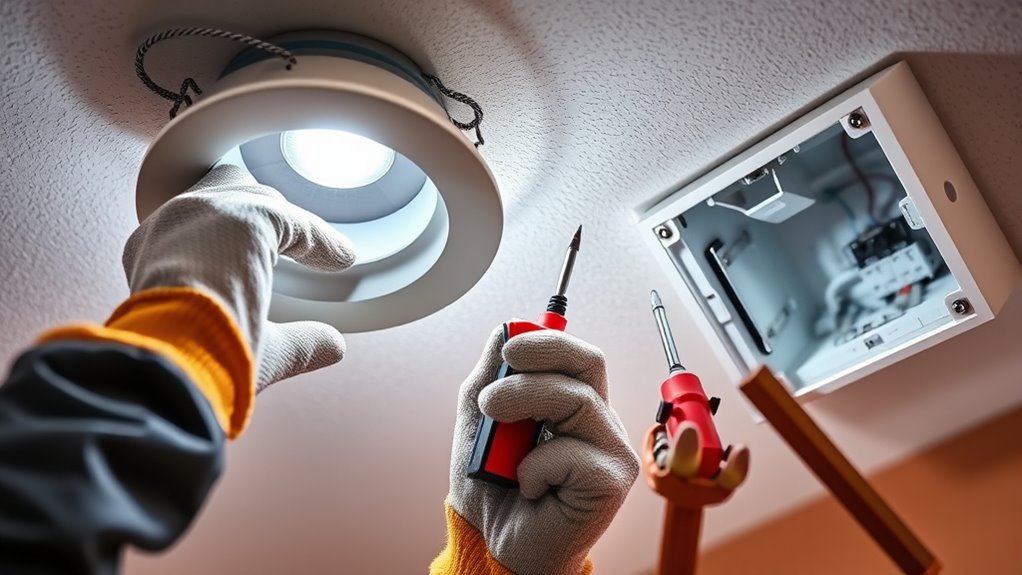
When troubleshooting recessed and surface mount lighting, always prioritize safety. Turn off power before inspecting or repairing, wear insulated gloves and goggles, and use proper tools. Double-check wiring connections and make sure fixtures are properly grounded to prevent shocks or fire hazards. Surface mount fixtures are easier to access, but recessed lighting requires care to avoid damaging ceiling structures. Staying aware of common issues and safety precautions helps prevent accidents—continue exploring these tips for more detailed guidance.
Key Takeaways
- Always turn off power and verify with a voltage tester before inspecting or working on recessed or surface mount fixtures.
- Use proper safety gear, including insulated tools, gloves, and goggles, to prevent electrical shocks or injuries.
- Recessed lighting requires careful ceiling clearance and space considerations; surface mounts are easier but still need proper wiring.
- Check wiring connections and grounding to prevent flickering, shocks, or fire hazards, regardless of fixture type.
- When unsure or dealing with complex issues, consult a professional to ensure safety and compliance with electrical standards.

GOL-SIV Electrician Gloves 1000V High Voltage,ASTM D120 Certified & Double Insulated Electrical Gloves,Rubber Safety Work Gloves (Blue,Large)
【Insulation Performance】 These electrician gloves feature insulated palms and fingers and comply with ASTM D120 standard, providing effective…
As an affiliate, we earn on qualifying purchases.
As an affiliate, we earn on qualifying purchases.
Understanding the Basic Differences Between Recessed and Surface Mount Lighting
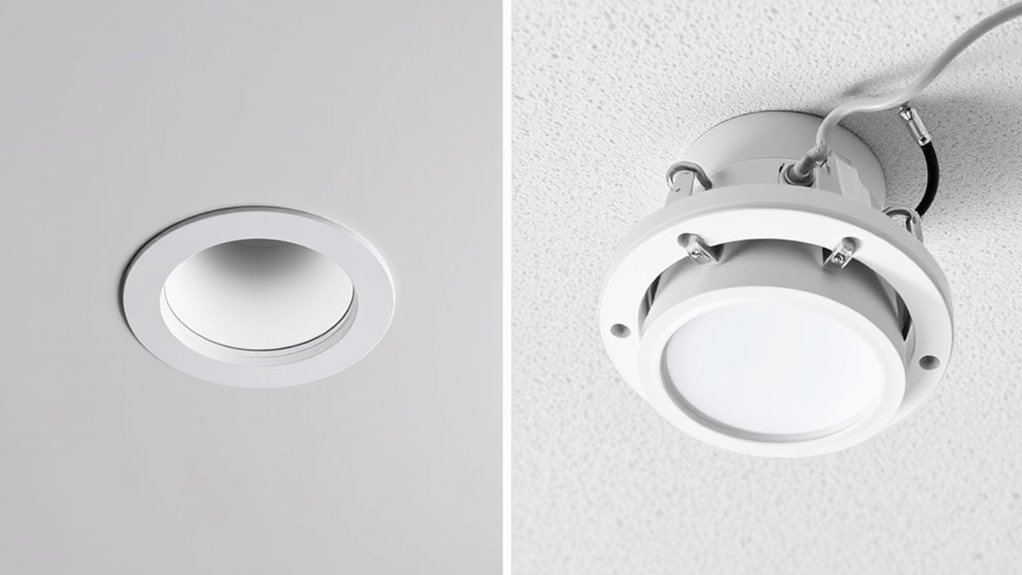
Recessed and surface mount lighting serve different design and functional needs, making it important to understand their basic differences. Recessed lighting is installed into the ceiling, creating a sleek, unobtrusive look that enhances modern aesthetics. When considering installation, you’ll need to account for ceiling thickness and space above the ceiling to guarantee proper placement. Surface mount fixtures, on the other hand, sit directly on the ceiling or wall surface, making installation simpler and more flexible, especially in spaces with limited clearance. From a design perspective, recessed lighting offers a clean, minimal appearance, ideal for streamlined aesthetics. Surface mounts can add a decorative touch or be used where recessed installation isn’t feasible. Knowing these differences helps you choose lighting that aligns with your space’s style and installation requirements. Additionally, understanding the lighting fixture types and their compatibility with your environment can improve both safety and aesthetic appeal.

Klein Tools NCVT1P Voltage Tester, Non-Contact Low Voltage Tester Pen, 50V to 1000V AC, Audible and Flashing LED Alarms, Pocket Clip
NON-CONTACT DETECTION of AC voltage in cables, cords, circuit breakers, lighting fixtures, switches, non-tamper-resistant outlets, and wires
As an affiliate, we earn on qualifying purchases.
As an affiliate, we earn on qualifying purchases.
Essential Safety Gear and Precautions Before Starting Repairs
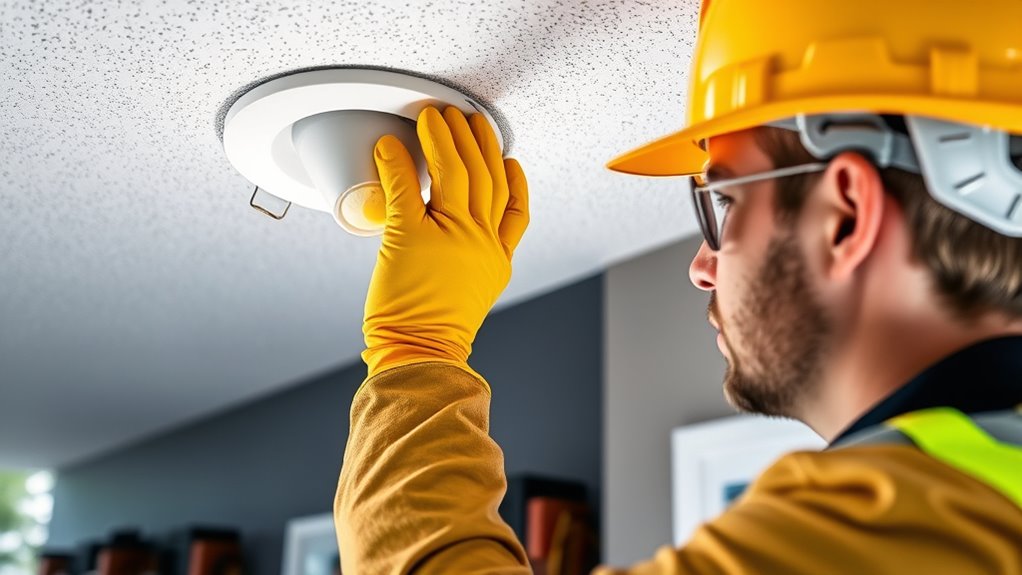
Before starting any repair work, it’s essential to prioritize safety by wearing the right gear and taking essential precautions. Always equip yourself with Personal Protective Equipment, such as safety goggles, gloves, and insulated tools, to prevent injuries from electrical shocks or debris. Ensuring your workspace is clear and well-lit reduces accidents. Additionally, plan for Emergency Preparedness by knowing the location of circuit breakers and having a fire extinguisher nearby. Turn off the power supply before working on any fixtures to eliminate the risk of electrocution. Double-check that the power is fully disconnected using a voltage tester. Staying informed about Data Privacy Challenges related to electrical systems can help you understand potential risks and safeguards. By following these safety steps, you minimize hazards and protect yourself during troubleshooting and repairs. Safety should always come first in any electrical repair project.

Wvapzwr 20Pcs Downlight Panel Lamp Spring Clip, Length 45mm/1.77inches Light Emitting Diode Recessed Lighting Accessories for Ceiling Lamp, Recessed Lighting Springs Clips, Black
Package & Size: 20pcs recessed lighting springs clips; Size: 45 x 22 mm/1.77 x 0.87 inch; Spring width:…
As an affiliate, we earn on qualifying purchases.
As an affiliate, we earn on qualifying purchases.
Identifying Common Electrical Issues in Recessed Fixtures
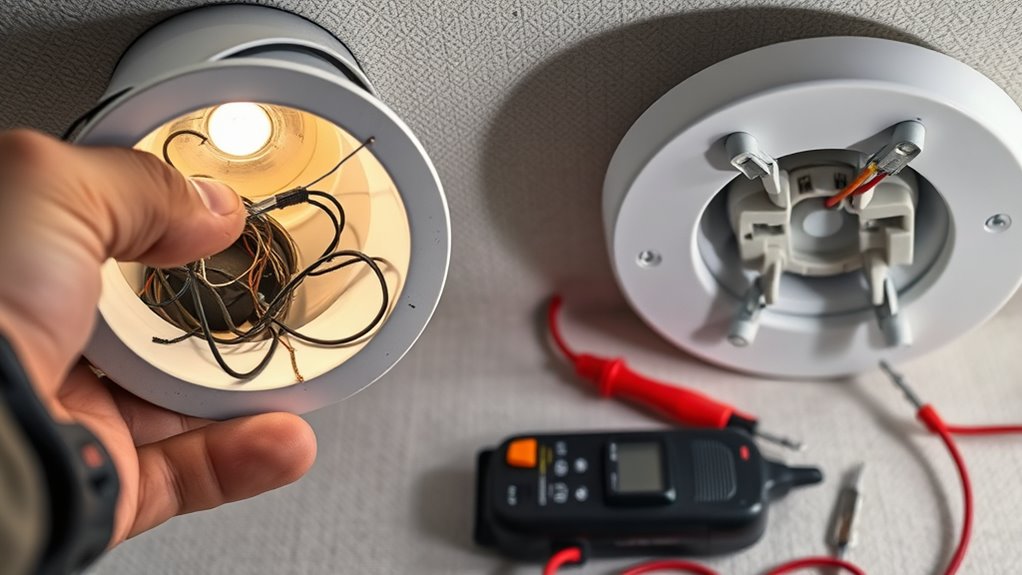
If your recessed fixtures start flickering or the light dims unexpectedly, it’s a sign something’s off. Loose wiring can also cause inconsistent lighting or no light at all. Recognizing these common issues helps you address electrical problems before they worsen.
Flickering Lights Causes
Flickering lights in recessed fixtures often indicate underlying electrical issues that need prompt attention. One common cause is a faulty bulb that needs replacement. Over time, bulbs can become loose or burn out, causing inconsistent lighting. Before replacing the bulb, turn off the power to avoid shocks. Sometimes, flickering results from dirt and dust buildup inside the fixture, which can interfere with the electrical connection. Regular fixture cleaning helps ensure proper contact and reduces flickering caused by debris. If replacing the bulb and cleaning don’t resolve the issue, the problem might be with the socket or the fixture’s wiring. Addressing these issues promptly can prevent further damage and ensure your recessed lighting functions smoothly and safely. Additionally, understanding electrical issues common in fixtures can help you troubleshoot effectively before calling a professional.
Loose Wiring Indicators
Loose wiring inside recessed fixtures can cause intermittent flickering or complete outages, making it a common electrical issue to watch for. Signs include flickering lights, unexpected outages, or sparks when handling the fixture. Wiring corrosion and grounding issues often lead to loose connections, increasing the risk of electrical hazards. To identify these problems, check for loose screws, frayed wiring, or discoloration around connections. Here’s a quick guide:
| Issue | Symptoms | Solution |
|---|---|---|
| Grounding issues | Shocking or flickering | Ensure proper grounding |
| Wiring corrosion | Discolored or rusty wires | Replace corroded wiring |
| Loose connections | Intermittent flickering | Tighten all wire nuts and screws |
| Insulation damage | Exposed wires | Replace damaged wires |
Address these indicators promptly to ensure safety and proper fixture function.
Dim or No Light
Have you noticed your recessed lights becoming dim or not illuminating at all? This could be due to a variety of issues, such as incompatible bulbs or aging components. Check if your fixture supports LED compatibility, as using incompatible LEDs can cause flickering or dimming. Also, consider the bulb lifespan; over time, bulbs lose brightness and may need replacement. If you’re using traditional bulbs, they might be close to burnout, resulting in no light. For LEDs, ensure they’re rated for your fixture and compatible with dimmers if installed. Loose wiring or faulty connections can also lead to dimming or no light. Always turn off power before inspecting and replacing any components to stay safe. Proper troubleshooting will help restore your recessed lighting’s brightness. Additionally, understanding the integration of AI in mobile devices can guide you in selecting smart fixtures that detect and adapt to lighting issues automatically.

Flush Mount Ceiling Light Fixtures – 3000K-4000K-6500K & 100W Equivalent Flat Led Lights for Room Ceiling,7.5Inch Ultra Thin Round White Ceiling Lights for Living Room,Bedroom,Kitchen,Bathroom,Hallway
【Ultra Thin Design – Fits Perfectly to Ceilings】Our led ceiling light flush mount are only 0.94 inches thick,…
As an affiliate, we earn on qualifying purchases.
As an affiliate, we earn on qualifying purchases.
Troubleshooting Surface Mount Lighting: Step-by-Step Safety Tips

When troubleshooting surface mount lighting, safety should always come first. Before you start, turn off the power supply to prevent shocks. Check LED compatibility to ensure your LEDs match your fixture’s specifications; incompatible LEDs can cause flickering or failure. If the light isn’t working properly, focus on power supply troubleshooting—inspect connections, fuses, and voltage levels to identify issues. Use a multimeter to verify voltage output and confirm the power source is functioning correctly. Always wear insulated gloves and safety glasses when working with electrical components. Avoid rushing—double-check all connections and components before restoring power. Taking these safety steps minimizes risks and helps you identify the root causes of lighting problems efficiently and safely. Additionally, understanding the best airless paint sprayer techniques can help when working on related lighting or finishing projects.
Handling Faulty Wiring and Connections Safely

Handling faulty wiring and connections safely is crucial to prevent electrical shocks and further damage. First, always switch off the circuit breaker to cut power completely. Next, use proper grounding techniques to minimize the risk of shocks if accidental contact occurs. Then, inspect connections carefully for corrosion, loose wires, or damage, and correct them with insulated tools. Confirm the circuit breaker is rated correctly for the circuit; never bypass safety features. Lastly, test the wiring with a voltage tester before working on it again. Remember, grounding techniques help protect you, and circuit breaker safety prevents accidental energization. Never work on faulty wiring without taking these precautions—your safety depends on it. Proper training is essential to understand and implement these safety measures effectively.
Preventing Accidental Damage During Installation and Repairs
Properly managing wiring connections and ensuring safety during repairs helps prevent accidental damage to your electrical system. Installation hazards, such as loose wires or improper connections, can lead to short circuits or equipment damage. To avoid this, double-check all connections before powering up, and use insulated tools to reduce the risk of shocks. Follow repair precautions by turning off the power supply completely and verifying that circuits are de-energized. Keep your workspace organized, and handle components carefully to prevent physical damage. Proper labeling of wiring and clear documentation also help minimize mistakes. Additionally, being familiar with Honda Tuning modifications can ensure that any upgrades or repairs are performed safely and correctly. Taking these steps reduces the chance of accidental damage, ensuring your installation or repair process is safe, efficient, and effective.
When to Consult a Professional for Lighting Troubleshooting

If your lighting issues persist despite troubleshooting basic fixes, it’s time to contemplate calling in a professional. A lighting expert can evaluate your lighting design for maximum energy efficiency and safety. Consider consulting a professional when:
- You can’t identify the source of flickering or dimming issues.
- The problem involves complex wiring or electrical components.
- Your lighting setup doesn’t meet safety standards or building codes.
- You want advice on upgrading to more energy-efficient fixtures or smart lighting systems.
- Recognizing the importance of professional assessment can prevent potential hazards and ensure compliance with current safety regulations.
Professionals have the tools and expertise to diagnose and fix issues that may be dangerous or costly if handled incorrectly. Knowing when to seek help ensures your lighting remains safe, effective, and energy-conserving.
Frequently Asked Questions
How Can I Tell if My Fixture Is Recessed or Surface Mount?
To tell if your fixture is recessed or surface mount, look at its dimensions and mounting hardware. Recessed fixtures are installed inside the ceiling or wall, so they sit flush or slightly inset, with visible trim or flange. Surface mount fixtures attach directly to the surface, with hardware visible around the edges. Check how the fixture is installed and examine the hardware; if it’s mounted directly on the surface, it’s surface mount.
Are LED Lights Safer Than Traditional Bulbs for These Fixtures?
LED lights are definitely safer than traditional bulbs, and it’s not even close! Their LED safety features include lower heat emission, reducing fire risks, and they don’t shatter like glass bulbs, making them safer for you and your home. When doing a bulb comparison, LEDs last longer and use less energy, so you get peace of mind and savings. Switch to LEDs for a safer, smarter lighting choice that outshines traditional bulbs in every way!
What Are Signs of Faulty Wiring in Lighting Fixtures?
You should look for signs of faulty wiring like flickering lights or frequent outages. Ground faults often cause flickering or dimming, indicating a potential wiring issue. If you notice sparks, burning smells, or if switches and lights feel warm, these are red flags. Always turn off the power and consult a professional electrician to inspect and fix wiring problems safely, preventing electrical hazards.
Can I Repair Electrical Issues Without Turning off the Power?
No, you shouldn’t attempt to repair electrical issues without turning off the power. Working on a live wire risks electrical shock, which can be deadly. Always disconnect the power at the breaker before inspecting or fixing wiring. If you accidentally touch a live wire, you risk severe injury. Safety comes first—never work on live electrical components, and if unsure, hire a licensed electrician to handle the repairs properly.
How Long Does Typical Troubleshooting Take for Each Type?
Troubleshooting can feel like an eternity, but typically, it takes anywhere from 30 minutes to a few hours depending on the installation time and complexity level. Recessed fixtures often require more time due to their hidden components, while surface mounts are quicker to diagnose and fix. Your experience may vary, but expect a thorough checkup to last 1-3 hours, especially if you’re dealing with complex wiring or tight spaces.
Conclusion
Being aware of the differences between recessed and surface mount lighting helps you troubleshoot safely and effectively. Remember, over 70% of electrical accidents happen due to improper handling or a lack of safety precautions. Always wear the right gear, follow step-by-step procedures, and know when to call a professional. Prioritizing safety not only protects you but also guarantees your lighting stays functional and long-lasting. Stay cautious and keep your space well-lit safely!